 |
| Clamping the Mold |
 |
| Helping the foam to spread. |
Today was another first, we got to cast some blades for one of the 2.5kW machines as there had been a problem with the blades at a previous instillation, which now need replacing. After chucking on our overalls we prepped the mold by gluing down a sheet of fiberglass on either side, making a funnel to pour in the foam and then after inserting a steel backbone we used an excessive amount of clamps to stop it leaking - its worth pointing our that this mold is a veteran at WindAid and has been in use for years, so it was pretty cool to get the chance to use it!

After a couple of dummy runs, we cast the blade with Formula One, pit-stop style efficiency - well, nearly. After mixing the chemicals you don't have a lot of time before the foam starts to expand, so we had to be quick at pouring it in and trying to make sure it spreads out evenly.
 |
| Hoping for the best. |
After all that excitement we wound the last 2 coils and then set about weighing them to check that they were the same, they weren't. Its important to ensure that they are roughly the same in order to prevent cogging*, which will disrupt the smooth spin of the rotor. Setting the coils out in sets of 6 as they will look in the rotors, prompted another group discussion about how the coils will be wired together - this proved to be another head banging against a brick wall situation for me, but we got there in the end. Essentially there will be three "phases" coming from 3 pairs of coils, which will then be fed into the rectifier and transformed into DC for use in charging the battery.**
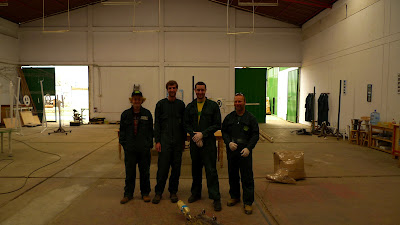 |
| I know what you're thinking: "With that hair, and that cap, why aren't there more pictures of Jack? |
 |
| Tico & Nino building a generator. |
The blade we had cast in the morning had dried so we took it out and set in a new one. The process of making blades only starts here however as you have to trim the edges, the tip and around the steel frame, this is so you can re-enforce it with carbon-fibre an resin - this is to stop the blade flying off, which apparently has been an issue in the past! After all this you have to give the blade several coats of primer and paint, sanding it down in between, all in all a pretty lengthy process. As we want to replace the broken blade as soon as possible, we cant afford the time to make 3 new blades, luckily there is a fully made 2.5kW turbine in the workshop waiting for a home, so we can use the blades for that as the replacement, and cast new ones at our leisure. All that remained to be done with the ready made blades was to ensure that their weight balanced, so we put together the generator and weighed the blades. As is customary, here we hit a bit of a road block, they all weighed different amounts!
 |
| Fernando kindly provided us with a rigorous description of the circuits. |
The solution was to brake open 2 of the blades at the tip and insert enough lead so that they all balanced, then setting it in with more carbon fibre and resin, then went home for a well earned beer - and a terrible film starring 50 cent...
 |
| Dan and Nino trying to get their heads around it.. |
*I wont go into the science of why this happens, mainly as I'm not that hot on it myself. I will try to do a post on it all at the end if anyone is interested, and just for my own clarification if nobody is!
** Again I will attempt to make more sense of this at the end.


 After a couple of dummy runs, we cast the blade with Formula One, pit-stop style efficiency - well, nearly. After mixing the chemicals you don't have a lot of time before the foam starts to expand, so we had to be quick at pouring it in and trying to make sure it spreads out evenly.


No comments:
Post a Comment