Tuesday, February 7, 2012

Day 14: The Mold for the Mold for the Stator.

Micheal trimming the edges.
After checking the progress of the wooden blades (great), we popped out the mold for the mold for the stator*, and cleaned off a few bits that weren't setting, trimmed the edges to give a nice square finish so that the 2 pieces would fit together nicely, and drilled some holes to let us clamp it all together.
Nino's turn
We wired up the coils in the mold and soldered them to create the tri-phasic circuit I mentioned in an earlier post, then we set them in a layer of resin an fiberglass, as well as a central column of carbon fiber (where the axle will be mounted) before heading off for lunch. After which Nino and I came back to wire up the 3 phases to the main cable - which runs off the turbine to the control system - and drilled a hole in the mold for it to fit through. Then we added a lot more carbon fiber, and fiberglass, clamped the mold together and poured in the resin, and left it to set overnight.
Making some holes so we can screw both sides together.


*I think this wordy phrase deserves some explaining as if baffled me at first. The first mold means that its a mold, the second one refers to the stuff that holds the coils in place, which sort of makes it the mold for the stator I guess, maybe it still baffles me...

Monday, February 6, 2012

Day 13: The start of Busy Week

Making molds with the "mold for the mold for the stator".
We got back to the house in time for breakfast sensing that we might need all the energy we have this week as Micheal will be busy with visitors who may potentially provide some funding for WindAid, so we will have to work extra hard without so much guidance.
Weighing the coils to avoid cogging.
We were greeted with some encouraging news when we came into the workshop, we saw that the wooden blades were coming along nicely and also that the mold-for-the-mold for the stator (a bit of a mouthful I know) was looking good, although not quite dry so we popped it out in the sun.


Wooden blades looking good.


What's left of the mold for the blades.
After lunch we went to our first Spanish class at a language school not too far from the house. We started off with the basics and all felt a little more confident actually, that is until he warned us next time we would be going out in to the public to test out skills!

Sunday, February 5, 2012

Day 12: Bye, Bye, Mancora!


Despite feeling a little ropey this morning I managed to get up for kick off of United Vs Chelsea where the hostel's  generator promptly cut out. When it came back on united were 3-0 down, but even their stirring comeback to rescue a draw couldn't inspire us out of out hangovers so we settled down to watch a few films. Later on feeling much better we went for a swim in the ocean which was great fun - if you define great fun as being thrown around by big waves and losing all sense of time and direction. Later we caught our bus back down to Trujillo and work, unlike the others in our hostel probably heading up to the next beach town for a party, I think we know which one we prefer.

Saturday, February 4, 2012

Day 11: Hello Mancora!

We arrived in Zorrtios at about 7am and after some breakfast headed down to the hotel where Snr Abel (still up there waiting for parts) showed us around. It was good to see them again as I now understand a little more about how they work, although I don't speak that much more Spanish!


After the tour we took a bus down to Mancora in search of more gringos, and gringos we found. We arrived before check-in at our hostel so we relaxed in the pool where we all got horribly sun-burnt, before heading out to the beach where the guys had a surf and I lay in the shade feeling sorry for myself. After which we headed back to the hostel for some food and drinks...

Friday, February 3, 2012

Day 10: Disaster with the Blade Mold!

I didn't go into the workshop today as I was feeling a bit ill (nothing some anti-biotics wont fix), and as we are going on a trip this weekend I decided to take it easy. The main news from the shop however was all bad unfortunately. Basically the wood from which the CNC was carving out the blade mold had warped which meant that the machine went right through the resin coat and ate into the wood. This prompted Micheal to decide that we should now use the CNC to carve out some blades from solid blocks of wood, so we have some to use, and then a mold can be made later on after we have left. Its a shame to have another setback but hopefully we will still get some blades out, and they will have their mold in the future.

Tonight we will get on a night bus up the coast so the others can get a look at the turbines in Zorritos before we head down to Mancora for some R&R.

Thursday, February 2, 2012

Day 9: Blades Revealed

Opening the blades we cast
Looking good.


We came in this morning to see that the lead had set well in the blades so now all we needed to do was sand them down and re-paint. These few extra tasks did mean however that we will not have time to go down to re-install the blades if we want to get a turbine of our own in!

Looking better!


 The day mainly consisted of us all getting on with our various different tasks, Dan was welding away with the connectors we had discussed a few days before, while Trevor and I sanded down the blades. Meanwhile Nino was working on a possible coil design that would allow us to overlap coils and get more in the stators, and therefore more out as power.*

They finally let me loose with the power tools!


The blade after it had been trimmed.

Dan can use the the tools with out supervision...


Trying to get the weight of the blades right.


It looks a mess but at least the weight is right!


*Its all to do with magnetic field lines and EM induction, fun to think about, but I will leave the 3D designing to the engineering students!

Wednesday, February 1, 2012

Day 8: Blade Casting


Clamping the Mold
Helping the foam to spread.
Today was another first, we got to cast some blades for one of the 2.5kW machines as there had been a problem with the blades at a previous instillation, which now need replacing. After chucking on our overalls we prepped the mold by gluing down a sheet of fiberglass on either side, making a funnel to pour in the foam and then after inserting a steel backbone we used an excessive amount of clamps to stop it leaking - its worth pointing our that this mold is a veteran at WindAid and has been in use for years, so it was pretty cool to get the chance to use it!

After a couple of dummy runs, we cast the blade with Formula One, pit-stop style efficiency - well, nearly. After mixing the chemicals you don't have a lot of time before the foam starts to expand, so we  had to be quick at pouring it in and trying to make sure it spreads out evenly.

Hoping for the best.
After all that excitement we wound the last 2 coils and then set about weighing them to check that they were the same, they weren't. Its important to ensure that they are roughly the same in order to prevent cogging*, which will disrupt the smooth spin of the rotor. Setting the coils out in sets of 6 as they will look in the rotors, prompted another group discussion about how the coils will be wired together - this proved to be another head banging against a brick wall situation for me, but we got there in the end. Essentially there will be three "phases" coming from 3 pairs of coils, which will then be fed into the rectifier and transformed into DC for use in charging the battery.**
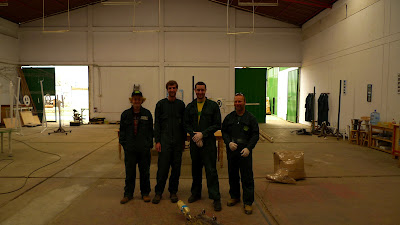
I know what you're thinking: "With that hair, and that cap, why aren't there more pictures of Jack?

Tico & Nino building a generator.
The blade we had cast in the morning had dried so we took it out and set in a new one. The process of making blades only starts here however as you have to trim the edges, the tip and around the steel frame, this is so you can re-enforce it with carbon-fibre an resin - this is to stop the blade flying off, which apparently has been an issue in the past! After all this you have to give the blade several coats of primer and paint, sanding it down in between, all in all a pretty lengthy process. As we want to replace the broken blade as soon as possible, we cant afford the time to make 3 new blades, luckily there is a fully made 2.5kW turbine in the workshop waiting for a home, so we can use the blades for that as the replacement, and cast new ones at our leisure. All that remained to be done with the ready made blades was to ensure that their weight balanced, so we put together the generator and weighed the blades. As is customary, here we hit a bit of a road block, they all weighed different amounts!
Fernando kindly provided us with a rigorous description of the circuits.
The solution was to brake open 2 of the blades at the tip and insert enough lead so that they all balanced, then setting it in with more carbon fibre and resin, then went home for a well earned beer - and a terrible film starring 50 cent...

Dan and Nino trying to get their heads around it..


*I wont go into the science of why this happens, mainly as I'm not that hot on it myself. I will try to do a post on it all at the end if anyone is interested, and just for my own clarification if nobody is!

** Again I will attempt to make more sense of this at the end.